
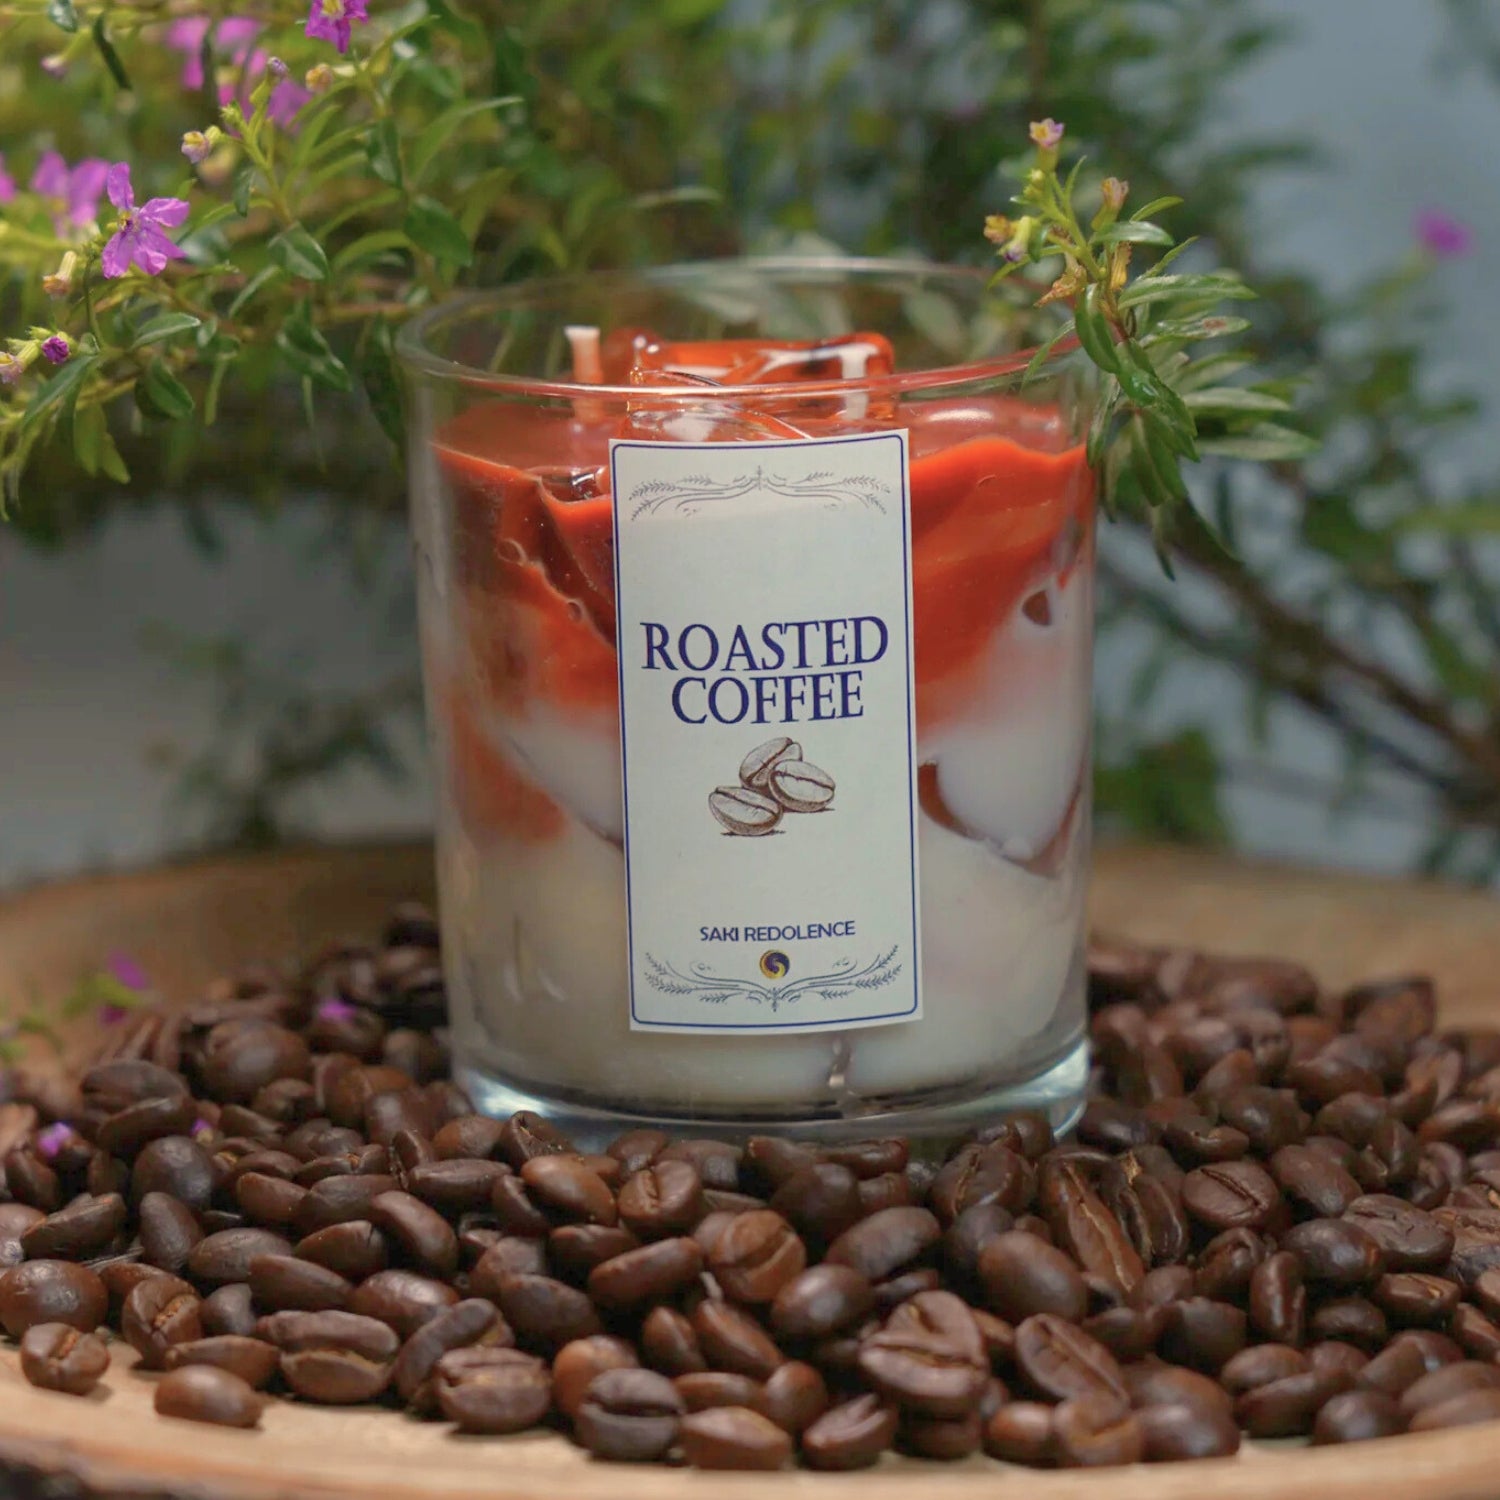
Coffee Candle Making Kit
How to Make Your Coffee Candle — Step by Step
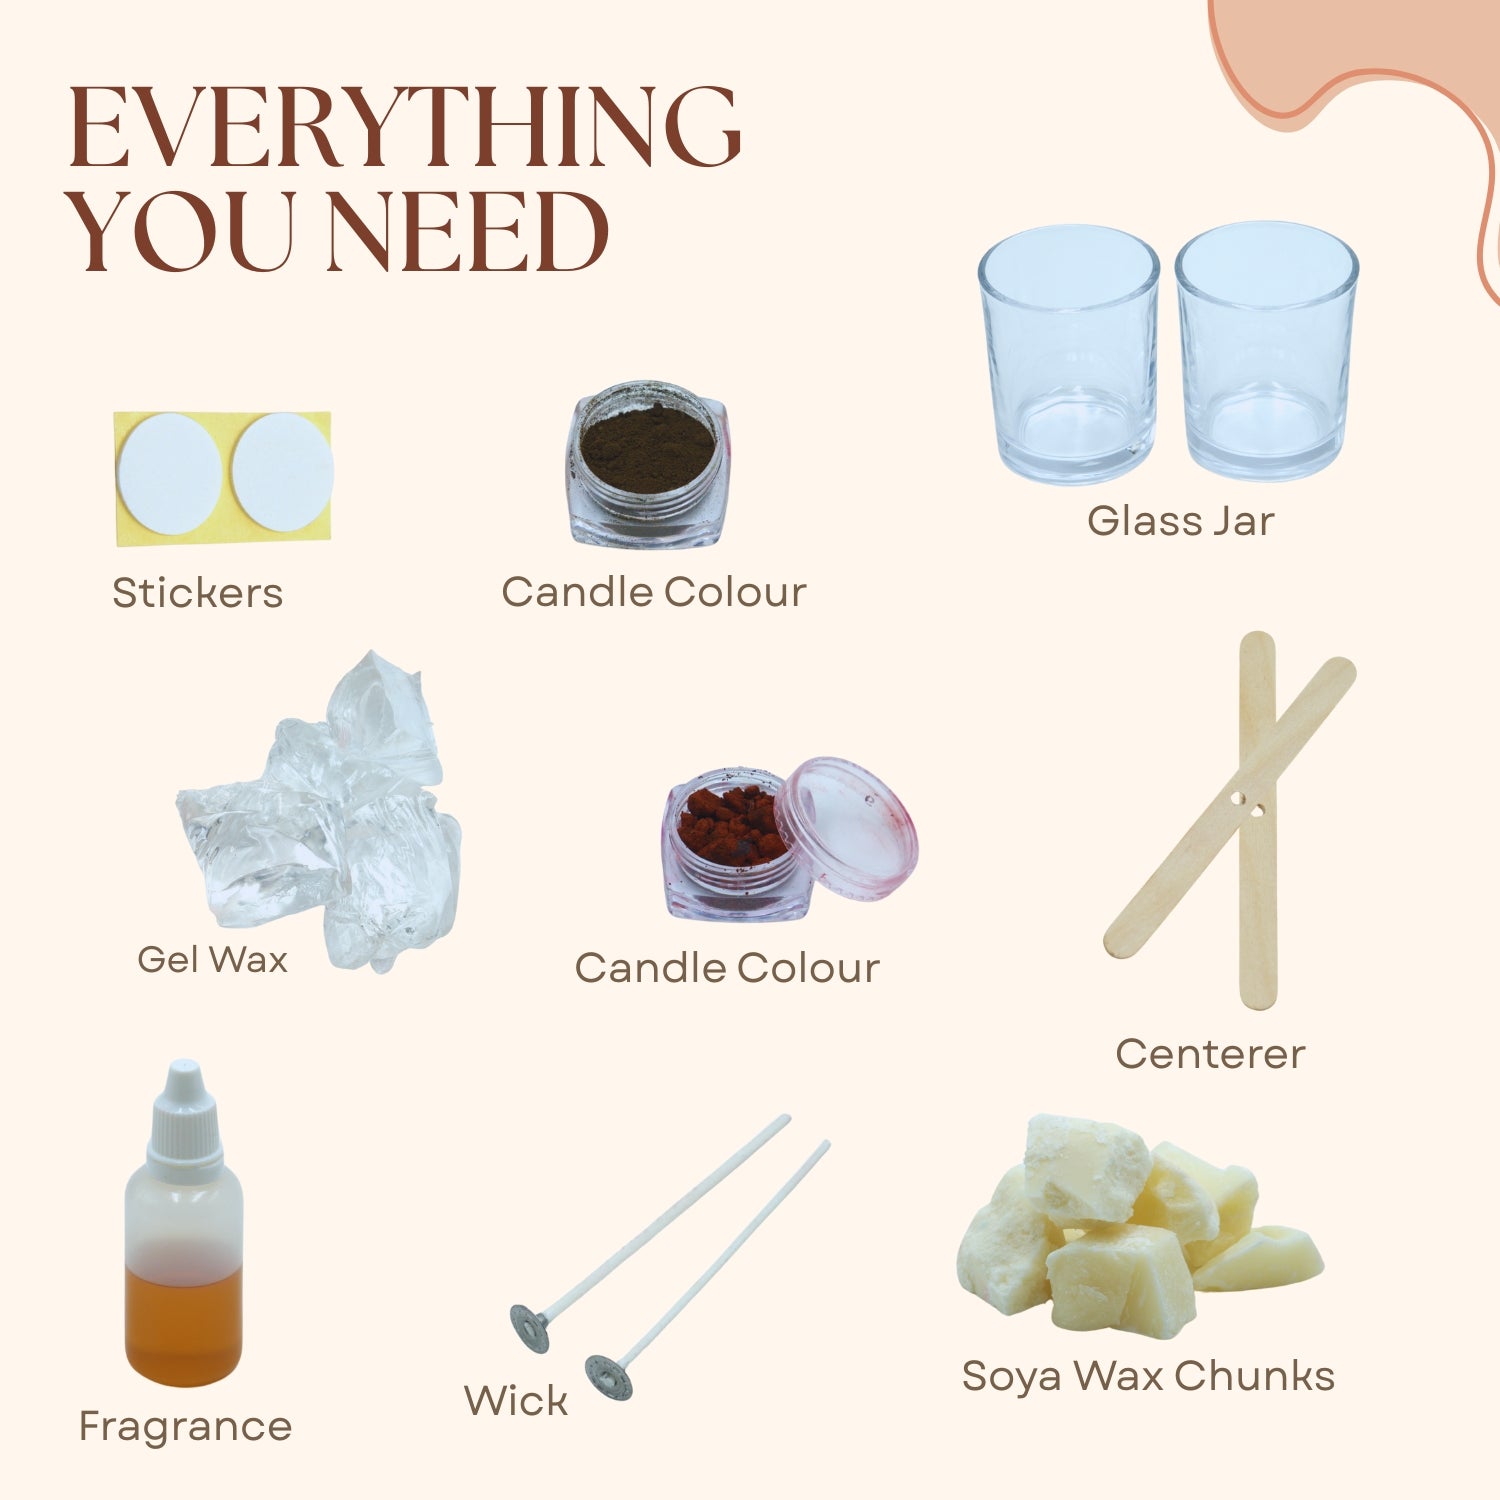
What you need (should be in your kit)
-
Soy (or natural) wax flakes
-
A candle wick
-
A heat-proof container / jar
-
Coffee-scented fragrance oil (or the “coffee scent” provided in the kit)
-
A stick or pencil to hold the wick straight while pouring
Optional extras (if you have): thermometer, glue dot or wick sticker
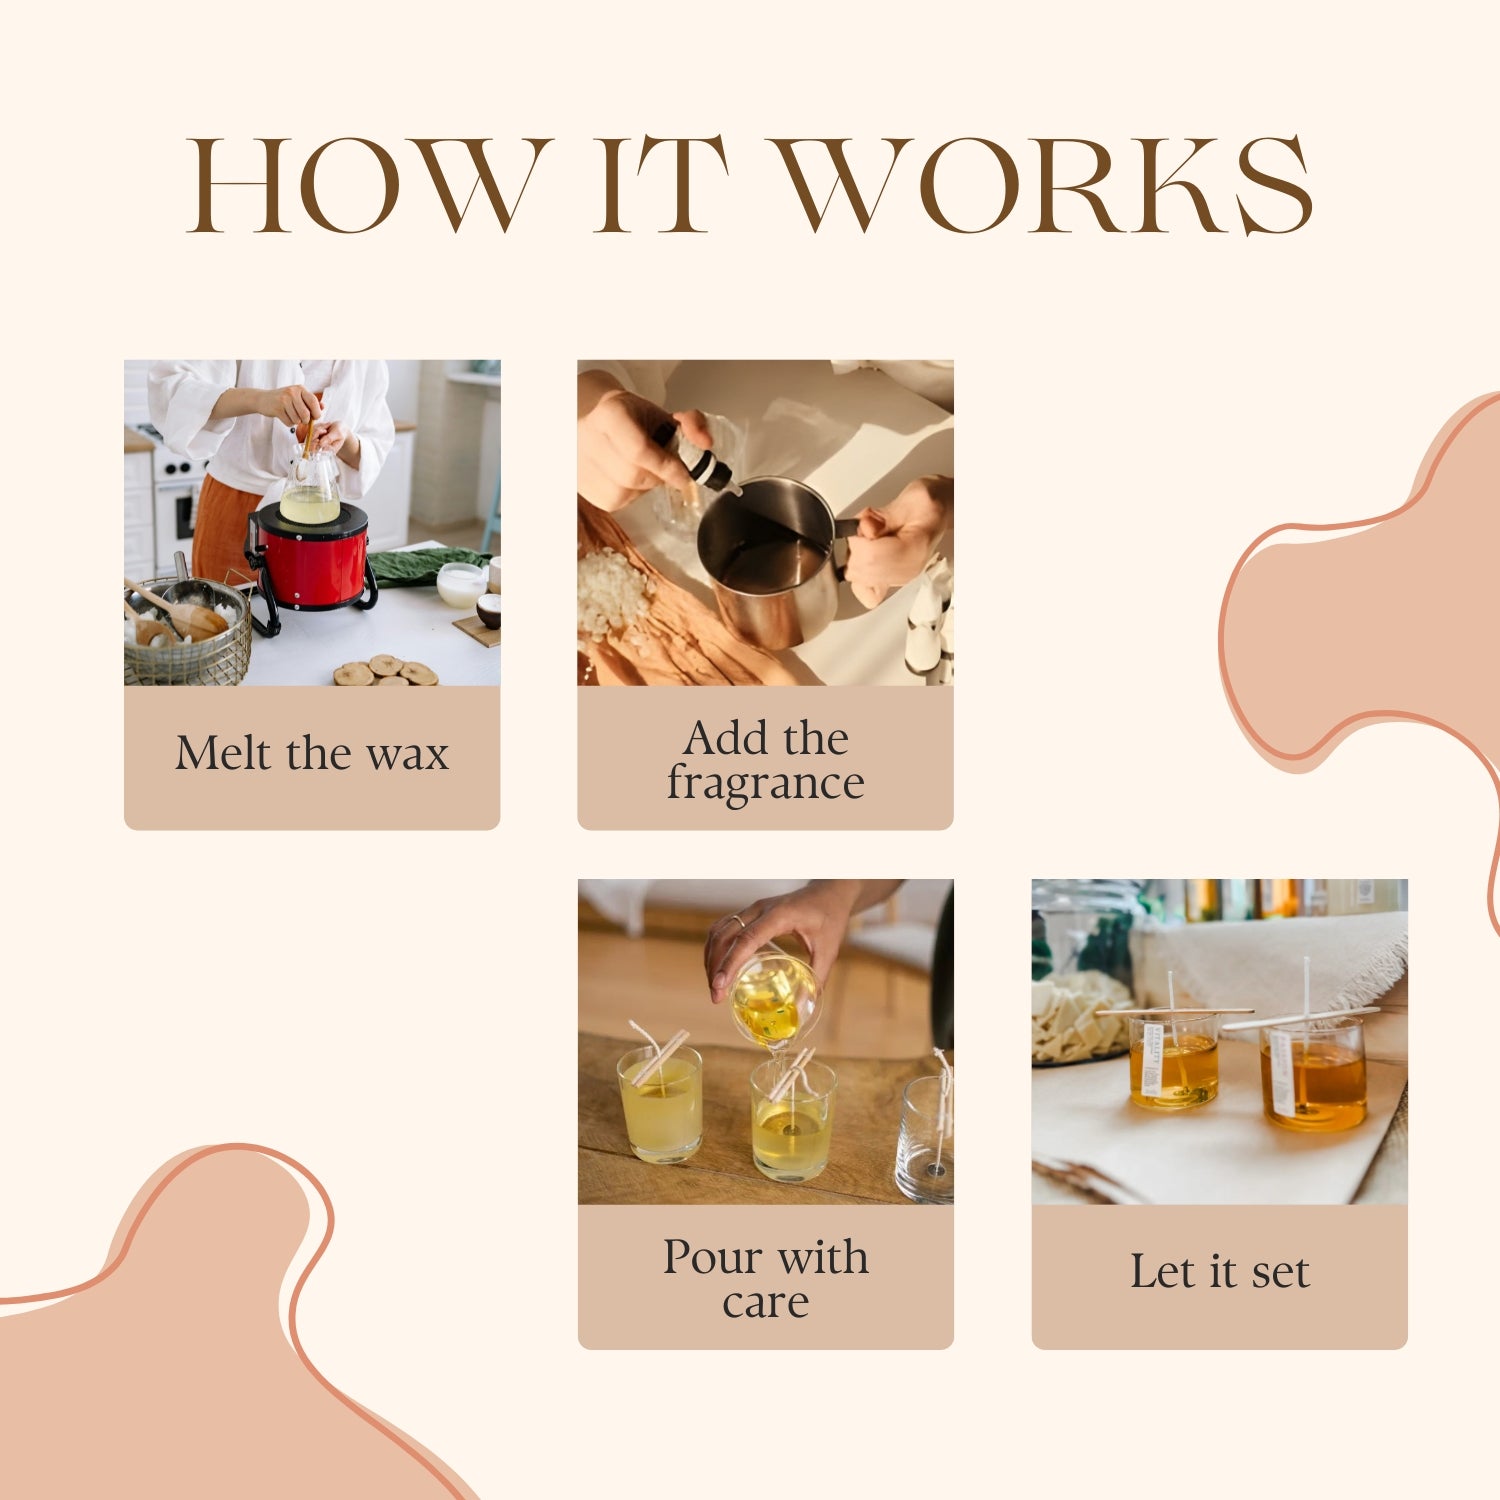
Step-by-Step Process
-
Prep your space
Lay down some newspaper or a cloth — wax can be a bit messy when hot. Make sure your container is clean and dry.
-
Melt the wax
Put the wax flakes in a heat-proof bowl or metal jug. Then use a double-boiler method: place that bowl/jug into a larger pot of simmering water. Stir occasionally until the wax melts completely and becomes smooth.
-
Attach the wick
While the wax is melting (or just before pouring), affix the wick to the bottom centre of your container. A small dab of melted wax or a wick-sticker works. Make sure the wick stands straight — you can rest a pencil or stick across the top of the container to hold the wick in place.
-
Add the coffee scent
Once the wax is fully melted, remove it from heat and let it cool slightly (too-hot wax can affect fragrance). Then stir in the coffee fragrance oil from your kit — mix gently but thoroughly so scent disperses evenly.
-
Pour the wax into the container
Carefully pour the scented wax into your wick-prepared container. Hold the wick upright as you pour. Leave a small gap at the top (don’t fill right up to the rim).
-
Secure the wick & let the candle set
Use a pencil, chopstick or similar object to make sure wick stays centered while wax hardens. Then leave the candle undisturbed at room temperature to cool completely (a few hours-long).
-
Trim the wick & final touches
Once the wax is firm, trim the wick to ~¼–½ inch above the wax surface. Clean any wax drips on the container. Optionally, you can let the candle “cure” for a day or two before lighting — this helps fragrance settle better.
🌟 Pro Tips & Safety Notes
-
Use containers that are heat-proof and suitable for burning (glass jars, tins, ceramic). Never plastic.
-
Don’t overheat the wax — gentle melting is enough. Overheating can affect scent or cause cracks when the candle cools.
-
Always keep wick centered — a tilted wick can lead to uneven burning or wax pooling.
-
Trim the wick before each burn (or after first burn) to get a clean flame and longer burn time.
Why Make Your Own Coffee Candle?
Because with your DIY kit you get to:
-
Choose the intensity of the scent — stronger or subtle as per your mood
-
Create a candle that’s hand-made, personal and unique — ideal for gifting or home décor
-
Enjoy the fun, tactile joy of crafting something with your own hands (and smell that pleasant coffee aroma fill your room!)
Choose options